
Whether you’re chasing a certain aesthetic or focused purely on the functional benefits, installing DIY handrails for outdoor steps is the kind of weekend project that pays off every time you walk outside. It boosts safety for your family and any visitors. It enhances your home’s curb appeal. Plus, completing the project yourself can provide a satisfying sense of accomplishment. When you’re ready to get started, scroll down for some help. We’ll break down the tools you need, recommend some easy-to-use kits, and provide expert advice to ensure the project goes smoothly.
How to Create DIY Handrails for Outdoor Steps
The Tools
The wonderful thing about using a handrail kit is that it’ll come with all the mounts, screws, and other hardware you need for a successful installation. However, you will still need some tools of your own to complete the job. Typically, you’ll need the following to get started:
- A Phillips-head screwdriver or bit
- An electric drill
- Drill bits
- A tape measure
- Bar clamps
If you need to cut custom lengths, you will likely also need a chop saw or hack saw and blue tape.
The Kits
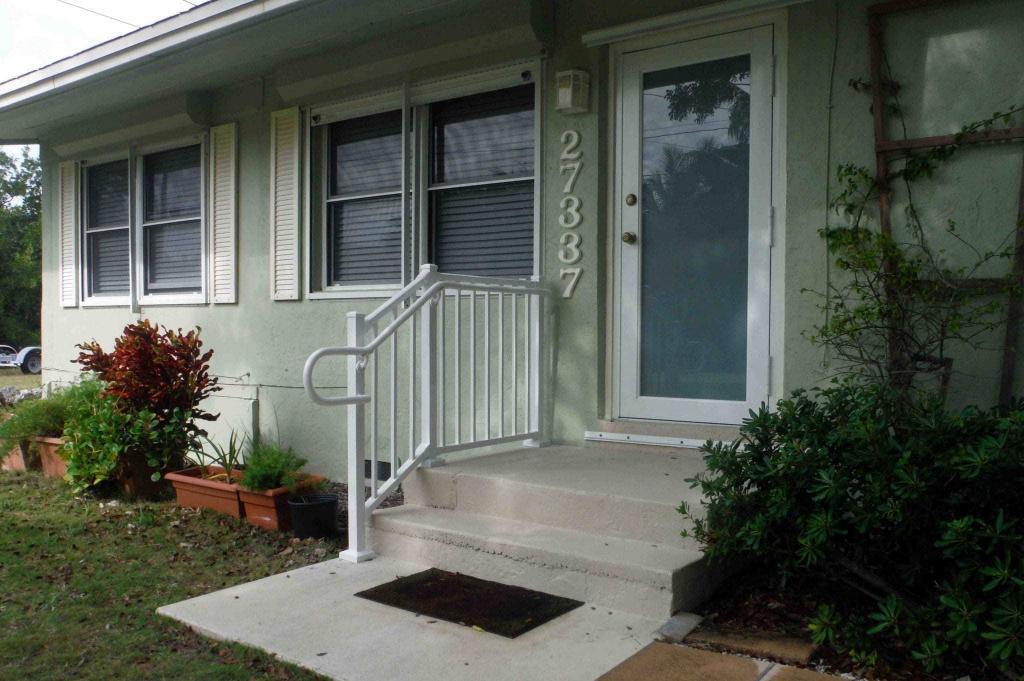
You can’t go wrong with one of Aluminum Handrail Direct’s handrail kits. We use a lightweight, long-lasting, easy-to-work-with powder-coated aluminum, and all of our handrail systems are backed by a lifetime limited warranty. They come in a variety of colors, textures, and finishes, and many are ADA-compliant. Plus, all our kits come with clear installation instructions, making the DIY process a breeze.
Our Tips & Tricks
Preparation is key. If you know what might go wrong, you can do your best to steer clear of it. Use the following tips to ease your way:
- Review all applicable building codes. Before you purchase a handrail kit, review any local or federal building codes that apply to your property. For example, if your steps are part of a business or public space, they likely need to comply with the Americans with Disabilities Act (ADA).
- Review property lines and underground utilities. This step is crucial for legal and safety reasons. Even minor encroachments onto public easements or a neighbor’s property can create long-term legal headaches. Call your local utility marking service to ensure your installation will be safe and compliant.
- Check the height. If your handrail is too high or too low, you could experience failed inspections or safety issues. Building codes usually require handrails to be 34 to 38 inches high, measured from the stair tread.
- Check the angle of the stairs. The handrail should consistently follow the slope of the stairs. If the angle is off, the support will feel awkward and unsafe.
- Ensure that your handrail has strong support. It should be firmly anchored into studs or masonry using high-quality wall mounts. Poor anchoring could cause the rail to wobble or fall off the wall entirely.
- Take your time with joint connections. If they’re sloppy or misaligned, they will compromise the handrail’s integrity and make it look unprofessional.
- Remember to extend the handrail beyond the top and bottom of the stairs. In most cases, handrails must extend beyond the top and bottom of a set of stairs to comply with building codes and ensure users’ safety.
_____
Installing DIY handrails for outdoor steps is easy if you have the right kit by your side. If you’re looking for a beautiful, long-lasting, and durable aluminum handrail, check out Aluminum Handrail Direct. We offer high-quality, maintenance-free aluminum handrails and accessories, and we would be happy to help you understand more about our options. Plus, our installation guides make installing your handrail a breeze. For more information, call us at 417-409-3179 or contact us online.